
In my experience, very few landscapers or homeowners know how to properly plant and mulch a tree.
Homeowners — forgivable.
Landscapers — not so much.
I still shake my head when I see poorly planted trees and “volcano” mulching on job sites. It’s one of the most common (and most harmful) mistakes in landscaping—and it’s completely avoidable once you know what to look for.
What Is a “Mulch Volcano”?
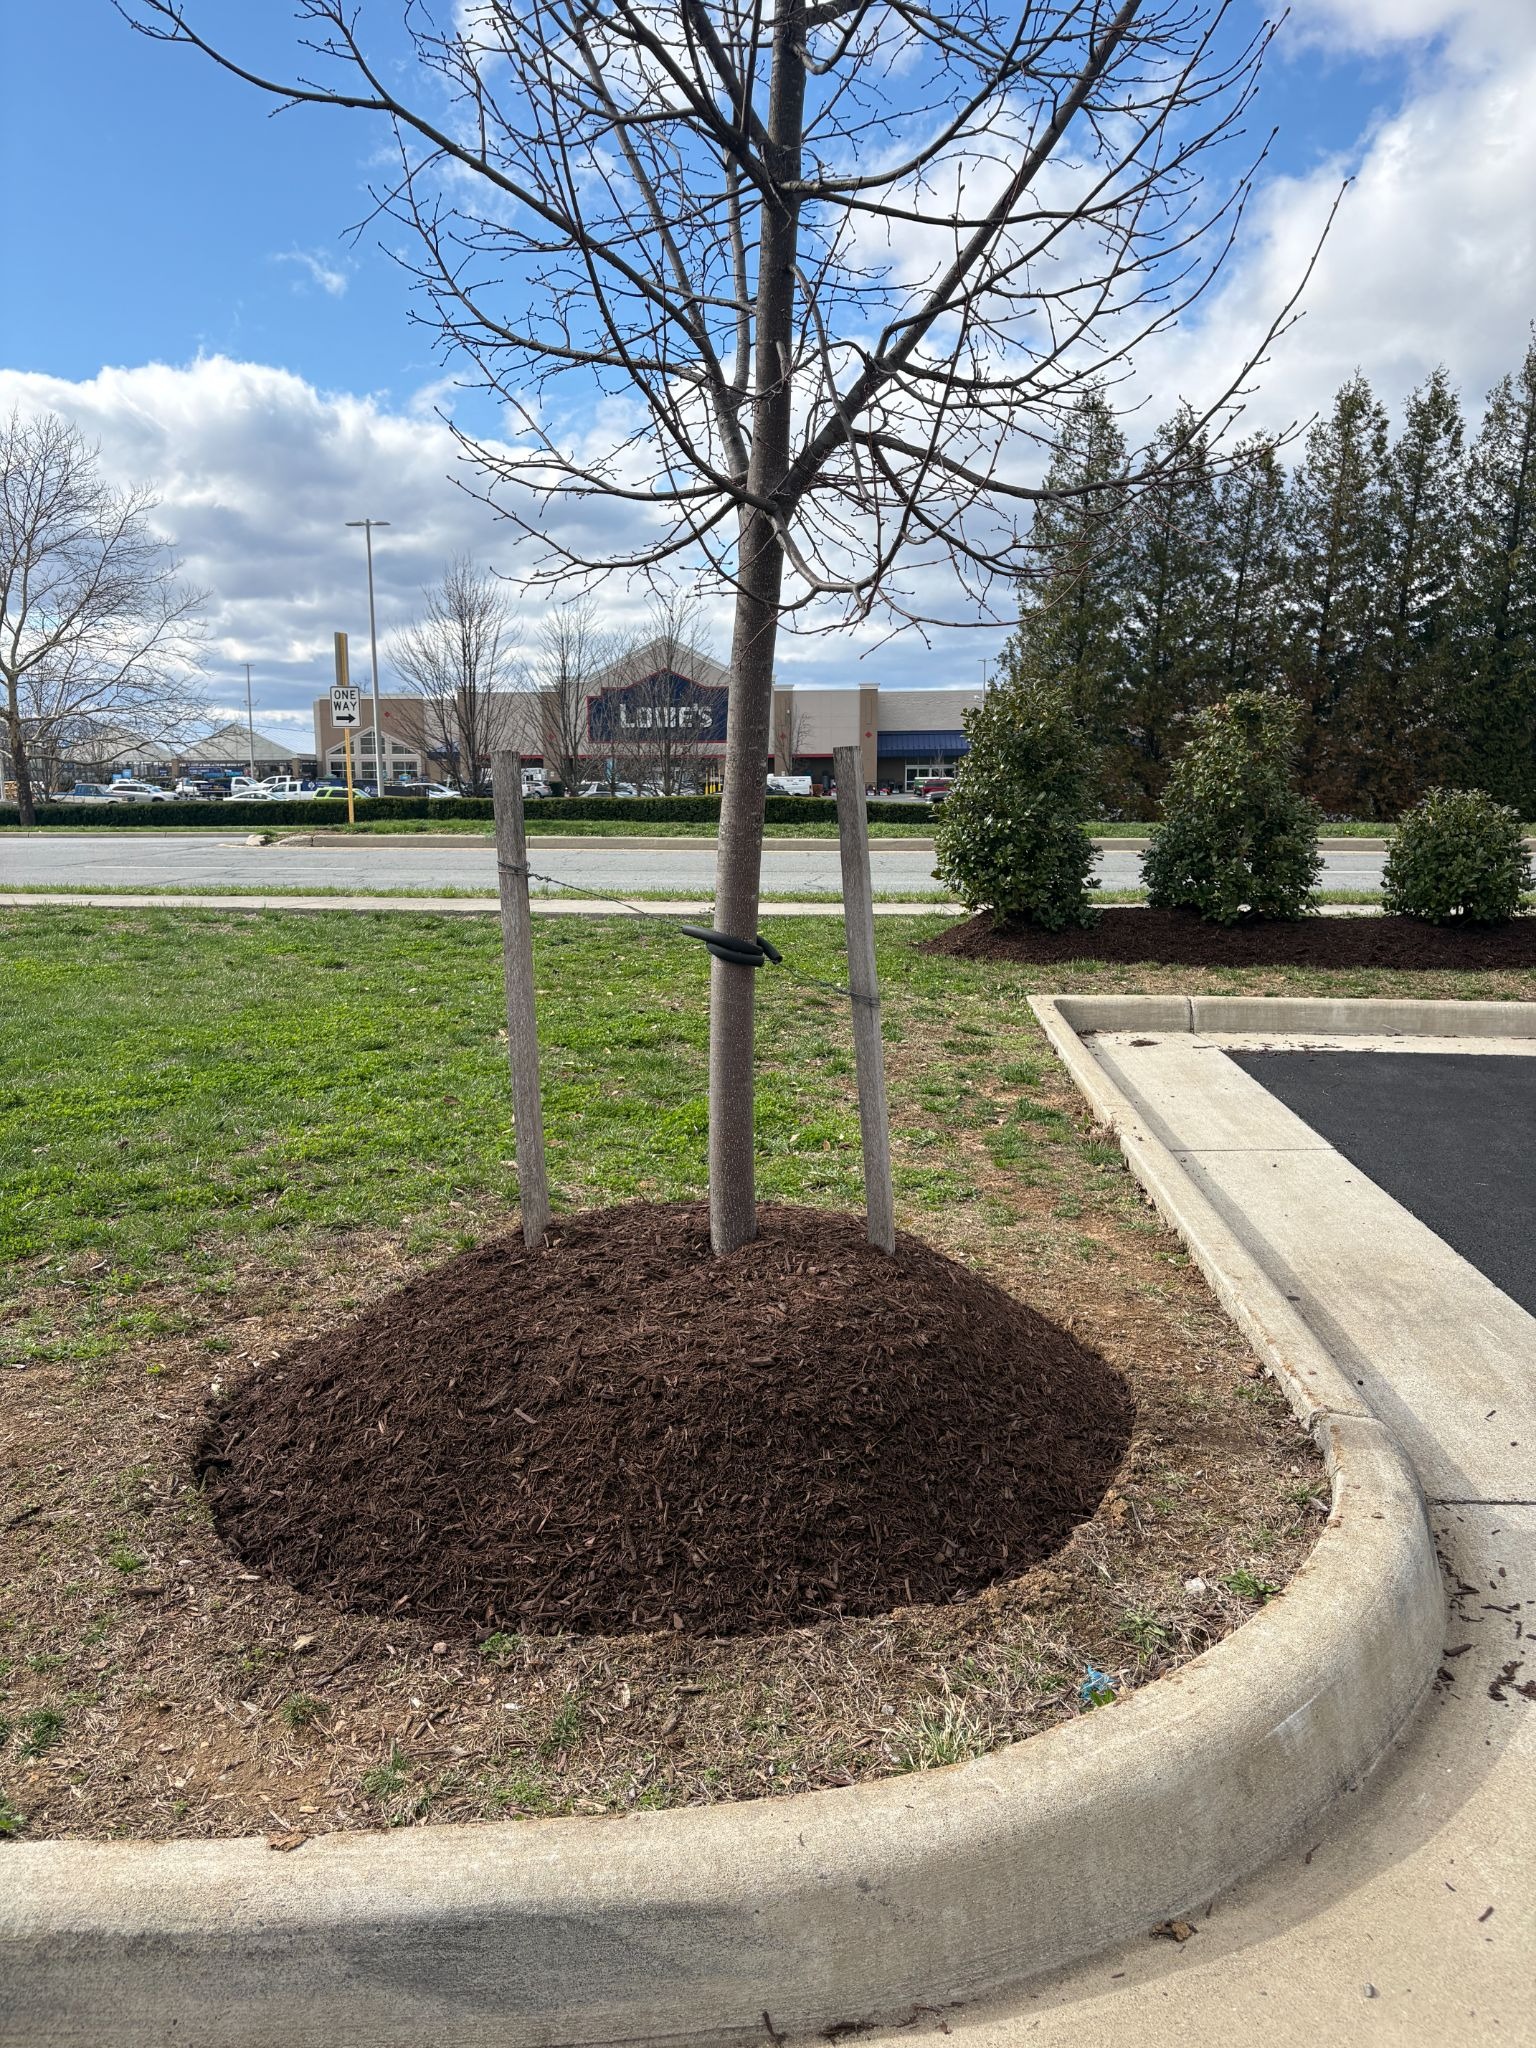
A mulch volcano is exactly what it sounds like.
It happens when mulch is piled in a steep mound around the base of a tree, getting thicker as it approaches the trunk. Most people do this because it looks neat or because they’re copying what they’ve seen elsewhere.
The result? A cone-shaped pile of mulch that resembles a small volcano at the base of the tree.
It might look intentional—but it’s actually one of the worst things you can do for a tree’s health.

Why Volcano Mulching Is Bad for Trees
1. Trunk Moisture & Rot
The trunk above the root system is not meant to stay wet.
When mulch is piled against the bark, it traps moisture and creates the perfect environment for:
- Rot
- Fungal growth
- Insect damage
Over time, this weakens the tree and can lead to serious decline.
2. Surface (Adventitious) Roots
When the root flare is buried or constantly damp, the tree may begin growing roots above the natural root zone.
These are called adventitious roots, and they:
- Are less efficient at absorbing nutrients
- Can wrap around the trunk (girdling roots)
- Slowly choke the tree over time
3. The “Shrinking Trunk” Effect
Here’s something people don’t always notice right away.
As mulch builds up year after year:
- The visible trunk appears shorter
- Lower branches start sitting closer to the ground
- The natural base of the tree disappears
This is a clear sign the tree has been buried too deeply—and it’s not a good one.
How to Mulch a Tree the Right Way
Getting it right is simple once you know the basics.
1. Size the Mulch Ring
Ideally, your mulch ring should extend out to the tree’s canopy (also called the dripline).
For smaller or newly planted trees:
- Aim for at least a 12–18 inch radius as a starting point
- Larger is always better when possible
Simple trick:
Tie a string to the trunk, attach marking spray or chalk to the other end, and walk a circle to create a clean, even ring.
2. Get the Depth Right (Less Is More)
This is where most people go wrong.
- Apply 2–3 inches of mulch at the outer edge
- Gradually taper it down toward the trunk
- Leave little to no mulch touching the trunk
👉 The root flare (where the trunk widens at the base) should always be visible.
3. Maintain—Don’t Pile
Mulch isn’t “set it and forget it.”
Each year:
- Loosen and refresh the existing mulch
- Add 1–1.5 inches of new mulch—primarily at the outer edges
- Expand the ring outward as the tree grows
Avoid adding layer after layer on top of old mulch. That’s how volcanoes start.
Final Thought
Think of mulch as a protective blanket for the roots—not a decorative mound around the trunk.
When done correctly, mulching:
- Conserves moisture
- Regulates soil temperature
- Reduces weed competition
- Supports long-term tree health
When done incorrectly, it can shorten a tree’s life.
And once you know the difference, you’ll start noticing mulch volcanoes everywhere.
If you’re new to this, start with my introduction to horticulture article and what to expect from my articles.